A faulty air conditioning unit is one of the problems that RVers fear the most in warm weather. A family vacation is a lot less fun when you’re sweating all the time. When it comes to major damage or malfunctions, you are better off relying on a professional or replacing the entire unit. Luckily, there are a few air conditioner problems that you can troubleshoot and fix yourself.
If you’re having issues with your air conditioner not turning on, then your first step is going to be checking your power source. Look for tripped breakers or blown fuses. If you have multiple appliances using the same power source then you should also check to make sure you have enough power to run everything at once.
Still not working? If you have power and everything seems to be in order, your next step will be to reset your unit.
Reset the system by following the instructions in your unit manual. After a hard reset, if you still don’t have power, there could be an issue with your circuit board or thermostat. Check your warranty before trying to fix it yourself and consult a professional.
It is worth noting, though, that repairs like this may be costly and not worth the investment, so it may be time to replace your unit.
If you must replace the unit, we love this 13500 BTU RV Air Conditioner and this 15000 BTU RV Air Conditioner by GE Appliances.
An air conditioner leak is not only inconvenient but could potentially be quite damaging to your RV. Whether you are experiencing leaks when it is raining outside versus when it’s not raining can indicate what kind of repairs you may need to do.
If your unit is only leaking when it is raining, then you will first check to make sure the unit as a whole is not loose. Units can loosen over time with bumps along the road and it could just be a matter of tightening all the bolts.
Bolts are not the issue? Then you may need to replace the gaskets. Over time, rubber gaskets can grow brittle and stop working as they should to protect your AC unit and RV. It is a fairly easy fix to replace the gaskets and you should be able to do this on your own.
If your problem is neither the bolts nor the gaskets, then check your RV roof for visible damage to things like vents, mounts, or caulk.
A leaking AC unit when it’s not raining is also a cause for concern. Condensation from your unit needs to go somewhere. If it’s ending up inside your RV, check that caulk or silicone isn’t blocking its exit. You’ll also want to check your unit’s drain pan if there is one to make sure there is no debris blocking the drainage hole.
The good news is that in almost all of these instances, you can do the relatively inexpensive fixes yourself. Severe roof damage, on the other hand, will require an expert opinion.
In your RV or your home one of the most frustrating AC unit problems is when the system is running, but not blowing out cool air. Why run if you can’t cool, right?
Fortunately, this could be just a matter of giving your RV air conditioner a thorough cleaning. Dirty coils and fins can cause inefficient air conditioners. Cleaning both and carefully straightening any damaged fins should help solve the problem.
While regularly cleaning your system is important to the general maintenance, it may not always solve this particular problem. If your unit relies on Freon for cooling, it may be running low. In this case, however, we suggest getting the help of a professional because of the dangers of Freon.
No matter what problems your RV air conditioner is facing, there is always a good chance that you can try troubleshooting before starting from scratch or spending large sums of money.
If the repairs get to be too much, however, don’t hesitate to seek help or invest in a new unit that will last you longer with the proper maintenance.
When you find yourself in need of a replacement part or a new RV air conditioner, you can rely on MWSS for the best products and the best service.
Shop all RV Air Conditioners and parts now. For OEM wholesale orders, please contact your sales representative.
The nice weather is back and it’s time to hit the road. Before you pack up and disappear for a few days it’s important to do some routine spring maintenance on your RV and your appliances.
When you’re ready to enjoy some springtime RVing, here are eight areas to inspect before pulling out of the driveway.
We want you to enjoy the warm weather without any major hiccups. Routine spring maintenance every year, particularly after letting your RV sit for a while or taking any winterizing precautions, keeps you ready to go at a moment’s notice.
Contact your dealer or local repair shop for replacement parts.
No one wants to deal with RV repairs of any sort, especially any that leave you stranded on the side of the road. When your RV A/C is out, the good news is that this isn’t something that’s going to stop you from hitting the road. It is, however, a major inconvenience. Camping during your time off in the summer is great, but sweltering in the heat inside your RV is a lot less great.
So, what do you do when your RV A/C needs repair? Here are our five basic tips for figuring out how to handle your broken A/C.
Your first step when you need RV A/C repairs is to troubleshoot. Look around for what might be the issue. It could be something as simple as your power source. Frying a generator because you had one too many things running at one time is a common issue. It’s not a fun one, but at least that will explain your A/C not working. If your A/C model is original to your RV, check your owner’s manual to see if there are any tips on quick fixes for your unit.
There are a few things you can do yourself if your A/C unit isn’t in proper working order, such as cleaning dust and grime off the filters and coils. If it comes down to one part needing to be replaced instead of the entire unit, this is good news. Only try taking care of the repairs yourself if the unit is not connected to power and you have an idea of what you’re doing. There are a couple easy things, though, that anyone should be able to do.
If your unit is leaking, try wiping down the condenser coils and seeing if you need to tighten or replace the gasket. If it’s running too loudly, make sure the rubber shock absorbers aren’t brushing against anything. If there’s ice around your unit, it may be time to top off your Freon.
If you’ve tried some simple repairs and it’s still not working, then it’s time to contact a professional repairman. Something could be wrong with your motor, thermostat, circuit board, compressor, or any of a number of things, that you likely don’t have the tools or expertise to fix on your own. Get a quote from a professional and see if your unit is repairable and worth salvaging.
No one wants to make the hard call to spend extra money on a brand new unit, but sometimes it’s a necessity. Repairs can get more expensive than they’re worth and with an older unit, it may be time to bite the bullet and replace it entirely.
If this is the case, MWSS, Inc. can help. We offer a wide selection of window and rooftop A/C units. By partnering with GE Appliances, we provide you with the best of the best quality products for your home away from home.
If it’s time for an upgrade, be sure to check out our GE Appliances Rooftop A/C. This innovative product is the next level when it comes to RV A/Cs. It’s quiet, efficient, and reliable.
Keeping up with regular maintenance and cleaning helps make your RV A/C last a lot longer. In fact, it’s not only a suggestion but a necessity. This important part of your RV won’t last forever, but a lot of future problems can be solved by cleaning and checking for general maintenance every six months. You should have it inspected and cleaned professionally every once in a while, too.
It may not seem like it during some parts of the year, but your A/C unit is an important component of your RV, especially if you’re planning a summer road trip. The good news is that repairs should be fairly simple, and even when they’re not, it’s easy enough to replace the unit. Don’t forget to check in on it every once in a while to make sure everything is in proper working order—and only do so with the unit unplugged!
Next time you’re in the market for a new rooftop A/C unit, keep MWSS, Inc. in mind. We offer the RV appliances, accessories, and electronics to get the job done right and we are always happy to provide any part and piece we can to get you back on the road faster.
Shop our selection of RV Rooftop A/C units here.
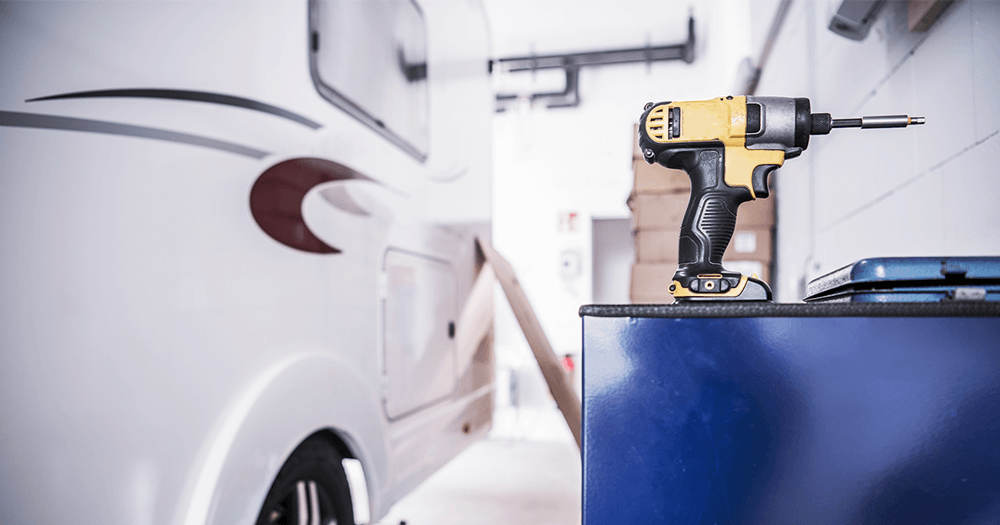
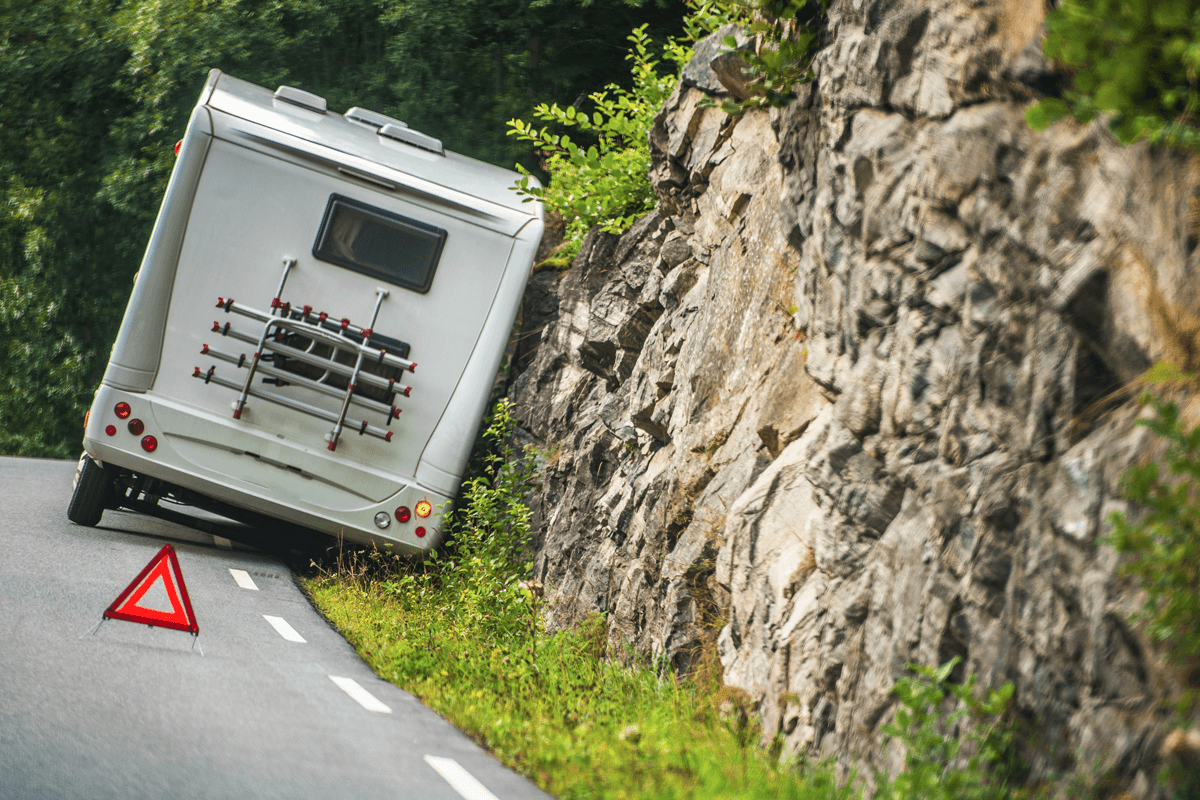
No RV owner wants to have an RV repair, but let's face it – sometimes things break unexpectedly and you need to know what steps to take in order to fix your camper. Our main priority is the same as yours, to get you back out on the road quicker, enjoying your RV! Nobody wants to deal with the headache that can accompany a vehicle repair, so we want to equip you today with all of the essential tips and steps you need in order to repair your RV while traveling.
The concept of preparing for something to break down sounds a little silly, but we promise you will be glad you did later on down the road. There are two basic components of repair preparation that, if taken, can and will save you valuable time and money in the future.
Any RV driver should invest in a roadside assistance service such as AAA or others. These programs give you the opportunity to have trained specialists, mechanics, etc. visit your RV wherever you break down. They will locate you, diagnose your problem, and either repair it onsite if they are able to or tow you to a repair shop to get the job done.
No matter what kind of rig you have, you definitely want some form of roadside assistance. If you do happen to get stuck somewhere, dealing with towing companies can be a nightmare and cost a fortune to use. Especially with bigger rigs, special tow trucks have to be used to haul these loads because regular trucks are not equipped with the right features to do. This will add an even larger fee to your already expensive towing costs.
It is a good idea to set aside a set amount of money or budget a dollar amount that you can use in case of emergencies. Unexpected accidents occur and it can be difficult to find the money when these instances do occur. Having a set budget reserved and waiting for you if you do need a repair can help your finances stay in check and not disrupt your normal budget.
The average RV repair costs $100 for parts and $200 for service, totaling $300 a repair. Depending on how safe and prepared you want to be, it is best to hold anywhere from $1,000-$10,000 for repairs in any given year. Any portion will help if the time comes when you do need it and you will thank yourself for having set funds available for use.
If you're in a bind and need a quick fix right then and there, your best bet may be to read your RV Manufacturer Manual first. This manual will give you important information about your specific camper's make, model, parts, features, and inner-workings. It will also provide you with valuable insights on how you can go about repairing your broken part.
Your RV Manual is a tried and true resource than you can fall back on to give you accurate information about your specific RV model. We suggest turning to it first to see if you're able to repair your camper yourself.
The final tip we have for you is to have a trusted RV manufacturer and/or the dealership of your RV model that you can contact. The dealership of your specific RV model will more than likely be able to provide you with the most accurate repair based on their expertise. No matter who you choose to rely on when it comes to repairing your RV, make sure they are a trusted, accredited source that you know will perform to meet your specific needs.
At MWSS, we are always happy to provide our customers with the replacement parts you need for any of your appliances! Whether a door handle breaks off of your 12V DC refrigerator or you need to replace your outdated A/C unit after it goes out, we have the RV appliances, accessories, and electronics to get the job done right so you can get back out on the road quicker!
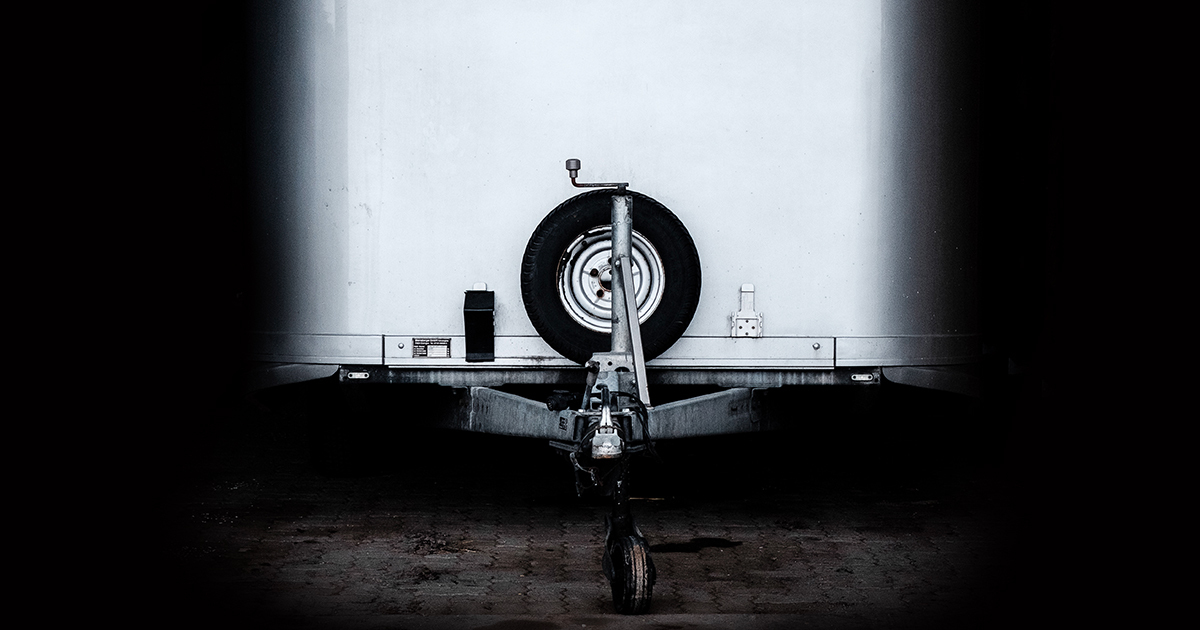
Hitching and unhitching your trailer/RV is basic step in RV maintenance that is necessary to know before embarking on a camping road trip. We are going to share some steps to take to prepare yourself and vehicles on hitching and unhitching your trailer to you RV. MWSS, Inc. was established in 1959 and has extensive RV experience and knowledge. We want our customers and followers to feel prepared and comfortable with using and operating their RVs. Keep reading for some of the basics you need to know before hitching your trailer.
When preparing for almost any project, demo, or assembly- having a checklist of all of the essential items you need to get the job done will make your job easier, the process smoother, and prevent accidents from happening. We have a list of some tried and true products that will make the act of hitching and unhitching your trailer/RV a breeze.
Keep these products nearby when you begin the process of hitching or unhitching your trailer for assistance.
First you need to insert and secure your hitch locking pin- ensure it is 100% secure before continuing. Now that your hitch is prepped and your trailer is raised for hitching, you need to actually attach the two together.
Almost all trailers have sway control bars, also known as weight distribution bars that create tension between the the trailer and tow vehicle. Their main purpose is to help even out the weight across both vehicles. They ensure safety during towing to prevent swaying from side to side during transit.
Next, you can lower the trailer and close the hitch ball receiver to make sure it is securely fastened. Before you get on the road, hook up your breaks and lights in order to safely travel. This will activate your break lights to work in conjunction with your vehicle. The last safety precaution to take is to connect the safety chains. In the event that your trailer does detach from your vehicle, this is your last defense mechanism. Make sure the chains are not hanging on the ground and ensure they are secure before leaving- just in case your hitch receiver fails or was not properly locked. The last step is to remove wheel chocks so you are able to freely move.
Once you hav arrived at your destination, the unhitching process is much simpler than the hitching process. It is almost everything in reverse, without the intense preparation. The first step in unhitching is to disconnect your safety chains and breaks. Next, you can lift your trailer with your jack and detach it from the hitch ball. This can sometimes pose a challenge because of tension between the two vehicles. Lastly, move your tow vehicle out of the way and level out your trailer to ensure it is ready to be parked.
We hope you have enjoyed walking through the process of hitching and unhitching your trailer/RV from your tow vehicle. If you have any questions regarding this process, feel free to reach out to us here. We love answering all of your RV-related questions and hope you have a successful time trying this process out for yourself on your next RV expedition.
As spring is in the near future, MWSS wants to give our loyal customers a list of regular RV maintenance tips to follow to have a successful trip without unexpected obstacles along the way. There are 3 main categories of RV maintenance:
Before you take your next RV camping trip, we recommend assessing this checklist of items to ensure you are safe and secure. It could be the difference between a safe, enjoyable trip and a costly, catastrophic one.
We hope these tips prepare you for your upcoming RV camping trip and act as a set of guidelines to practice regular RV maintenance. It is always better to be safe than sorry when it comes to RV maintenance and being proactive can save you the time and stress that comes with an accident or sudden mishap. Contact us here to assist you with any RV appliance and electronics updates before your next RV camping trip.